Local business owners rarely have time to build a slick onboarding experience for their clients. You sign a new customer, then spend the next hour cobbling together a welcome email, a PDF checklist, and maybe a shared folder that nobody actually opens.
A well-built onboarding portal fixes this by giving every new client one clear place to go, with the right information showing up at the right time. The good news is you don’t need a developer or a big budget to make one that looks professional.

Tools that combine presentations, documents, and websites in one place have made this kind of project realistic for small teams. You can turn a rough outline into a working portal in an afternoon instead of a month.
This guide walks through how to plan, build, and maintain one that actually gets used.
Key Takeaways
- A good onboarding portal has one clear job and guides new clients step by step.
- You can turn existing files and notes into a polished portal quickly with AI-assisted tools.
- Tracking a few simple engagement signals helps you improve the portal over time.
Define the Portal’s Job Before Building It
Before you open any design tool, decide what the portal needs to accomplish and who will use it. A portal that tries to do everything—sell, onboard, train, and generate leads—usually ends up doing none of those things well.
Getting clear on the job first saves you from rebuilding multiple pages later just to fix confusing structure.
Identify the Client Journey and Activation Milestones
Map out what a new client needs to know or do in their first week, first month, and beyond. Write down the exact steps: sign contract, submit paperwork, schedule a kickoff call, receive login details.
Each of these becomes a milestone your portal should support, not just describe. Think about the moment a client feels truly “onboarded.”
Maybe that’s their first completed project or their first invoice paid without a question. Design the portal so it pushes clients toward that milestone as fast as possible, without skipping steps they actually need.
Choose the Right Format for Services, Training, and Resources
Not every piece of content belongs on the same kind of page. Service overviews often work best as short documents clients can skim and return to later.
Training material may need more structure, like a checklist or step-by-step guide, while general resources can live on simpler reference pages. If a client needs to read it once and act on it, keep it short and visual.
If it’s something they’ll refer back to repeatedly, like a policy or a resource library, give it a dedicated space with clear headers.
Separate Client Onboarding From Lead Generation
It’s tempting to combine your onboarding portal with your marketing funnel, but mixing the two creates confusion. Lead generation content is built to attract and convince new prospects.
Onboarding content is built to guide people who already said yes. Keep lead magnets and top-of-funnel offers on separate pages or a separate site entirely.
Your onboarding portal should feel like a private, focused space, not another sales pitch. This separation also makes it easier to measure each one on its own terms later.
Turn Local Business Knowledge Into a Clear Content System
Most local businesses already have the raw material for a great portal sitting in old files, emails, and the heads of a few key employees. The work is pulling that scattered knowledge into one organized system.
AI tools can speed up the writing and formatting so you’re not starting from a blank page.
Collect the Inputs From Existing Files and Subject-Matter Experts
Start by gathering what already exists: PDFs, spreadsheets, old slide decks, welcome emails, and training notes. Interview the people who actually onboard clients today, like your office manager or lead technician, because they know the questions clients ask most often.
Make a simple list of every document and every person you need to pull from. This step feels slow, but skipping it usually means rebuilding the portal later once you realize something important got left out.
Create a Reusable Information Architecture
Once you have your raw content, group it into categories that make sense to a client, not just to you internally. Common categories include Getting Started, Services, Policies, and Support.
Keep the structure the same across every client type so future updates are easier to manage. Here’s a simple content map:
| Section | Purpose | Example Content |
|---|---|---|
| Welcome | Set expectations | Timeline, contact info |
| Services | Explain what’s included | Scope, pricing tiers |
| Resources | Support ongoing use | FAQs, guides |
| Contact | Reduce back-and-forth | Support channels |
Draft a Minimum Viable Portal With AI Assistance
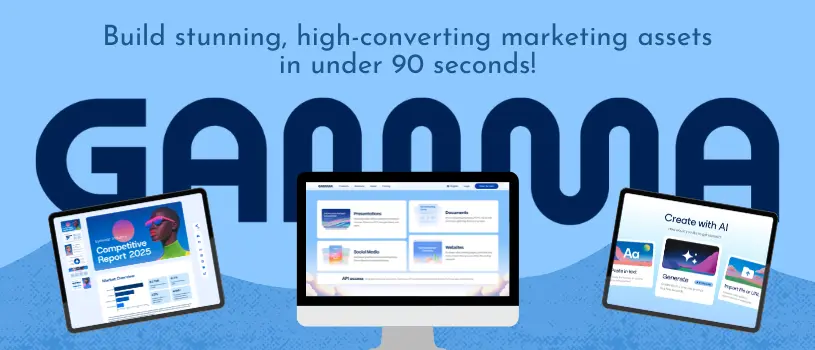
You don’t need a finished product on day one. Paste your gathered notes into an AI tool like Gamma AI and let it generate a first draft of your pages, then edit from there.
You can also import existing documents directly instead of retyping everything by hand. AI-generated content works best as a starting point, not a final answer, so plan to review it for accuracy and tone.
Many platforms use AI credits for generation tasks, and starting with presentation templates can speed up formatting even further. This approach turns a multi-week project into something you can draft in a single sitting.
Build a Brand-Ready Experience That Clients Can Navigate
A portal that looks inconsistent or hard to follow undermines the trust you’re trying to build with a brand-new client. Strong branding, clear navigation, and modular pages for different client types work together to make the experience feel intentional rather than thrown together.
Apply Consistent Visual Identity Across Every Client Touchpoint
Use the same colors, logo placement, and custom fonts across every page of the portal. Custom themes make this easier because you set the look once and it applies everywhere, instead of formatting each page by hand.
Small inconsistencies, like a mismatched font on one page, stand out more than people expect. If your business already has brand guidelines, pull directly from them instead of guessing.
This consistency signals professionalism even before a client reads a single word of content.
Design Navigation for First-Time Visitors
Assume the client has never seen your portal before, because they haven’t. Put the most important information, like next steps and contact details, somewhere obvious on the first page they land on.
Avoid burying key actions three or four clicks deep. A short table of contents or menu at the top of the portal helps orient new visitors immediately.
Test the navigation yourself by pretending you are a brand-new client trying to find something specific, like your onboarding checklist.
Use Modular Pages for Different Services and Client Types
If your business serves different kinds of clients, like residential and commercial customers, build separate modular pages instead of one page trying to cover everyone. Multiple pages let you tailor language and content without cluttering the main experience.
You can link between them so clients only see what applies to them. Once your portal is stable, consider connecting it to a custom domain so the experience feels like a natural extension of your existing website rather than a separate tool.
This small step adds credibility and makes the portal easier for clients to remember and revisit.
Publish, Share, and Connect the Portal to Daily Workflows
Building the portal is only half the job. It also needs a clear path into your daily operations, so your team knows how to share it, update it, and answer questions that come up along the way.
Select a Sharing Method That Fits the Client Relationship
Some clients respond better to a direct link sent by email, while others expect the portal to be introduced on a kickoff call. Match your sharing method to how formal or high-touch the relationship is.
For higher-value clients, walking through the portal live during onboarding often builds more trust than a cold link. Keep a standard message template ready so your team shares the portal the same way every time.
Consistency here reduces confusion and makes the handoff feel polished rather than improvised.
Bridge Existing Slide Assets and New Web Content
Many local businesses already have PowerPoint or Google Slides decks used for sales or training. Rather than starting over, bring that content into your portal and reformat it for the web.
Some tools also support PowerPoint export, so you can keep a downloadable version available for clients who prefer offline files. This bridge matters because it protects the work you already put into those older materials.
It also gives you a faster path to a complete portal since you are adapting content instead of writing it from scratch.
Assign Ownership for Updates and Client Questions
Decide early who owns the portal after launch. Without a named owner, portals tend to go stale within a few months as pricing changes or policies update.
Use collaboration features and collaborative editing so more than one person can make updates without stepping on each other’s changes. Check the gamma dashboard or your platform’s equivalent regularly to see who last edited a page and when.
If something breaks or a client has a technical question, know who on your team is responsible for reaching out to gamma support or your platform’s support team, especially if you’re on a plan with priority support.
Measure Adoption and Improve the Client Experience
A portal is never really “done.” Watching how clients actually use it tells you where the gaps are, and small adjustments over time keep it useful as your business grows.
Set Useful Engagement Signals Before Launch
Decide what “success” looks like before clients start using the portal, not after. Simple analytics like page views, time spent on key pages, and click-through rates on important links can tell you a lot.
If a critical page barely gets visited, that’s a sign it’s either hard to find or not needed at all. Track a small number of signals consistently rather than trying to measure everything at once.
Three or four clear metrics reviewed monthly beat a dashboard full of numbers nobody checks.
Optimize Discoverability and Conversion Paths
If part of your portal is public-facing, basic SEO practices help new visitors find it through search. Clear page titles, descriptive headers, and fast load times all matter here.
For pages meant to support lead generation, make sure the path from “visitor” to “next step” is short and obvious. Compare this to general-purpose design tools like beautiful.ai or tome, which are built more for one-off decks than ongoing client portals.
A dedicated onboarding structure tends to perform better over time because it is built around repeat visits, not a single presentation.
Establish Team Controls as Portal Use Expands
As more team members start using the portal, access controls become even more important. Features like single sign-on (SSO) are super handy when multiple employees or departments, like HR, log in regularly.
Set clear permissions so only the right people can edit sensitive pages, such as pricing or contracts. This helps keep everything organized and secure.
Make it a habit to revisit these controls every few months as your team grows. A portal built for three users is a whole different ballgame when ten people rely on it daily.
Staying ahead of these changes helps you avoid messy permission problems down the road.